WordPress is one of the most popular CMS out there. It powers more than 30% of all websites on the internet. Moreover, it’s an open-source program and is available for free. There are thousands of themes, plugins, and documentation available on the internet. This makes WordPress a first choice for bloggers and small and big companies to get their websites up and running quickly and easily. In this guide, we will learn how to install WordPress on CentOS 7.
Prerequisites
Before we learn how to install WordPress on CentOS, I am considering that you have a CentOS server installed on your server.
Furthermore, it’s important that you have either LAMP or LEMP Stack installed. If you don’t have these components installed on your server, you can follow our following guide:
How to Install WordPress on CentOS?
Step #1: Create a MySQL Database
Since WordPress uses a relational database to manage a website, we need to create a database first. To get started, you need to log in to your MySQL using root:
mysql -u root -p
You will be prompted to enter the root password. Once you enter the password, you will be taken to the MySQL Command Prompt.
Now, let’s create a database for our WordPress-based website:
CREATE DATABASE database_name;
Now create a new database user and assign it a password by running the command below:
CREATE USER database_user@localhost IDENTIFIED BY 'password';
database_user: It is a database username. You can keep the username of your choice.
password: It is the user password for your database. Your password must include a combination of uppercase, lowercase letters, and special characters. This will make your database more secure.
After creating a database user and assigning a password to it, we need to grant the user access to the database.
GRANT ALL PRIVILEGES ON database_name.* TO database_user@localhost IDENTIFIED BY 'password';
Now that we granted the access required by the user to the database, we need to flush all the privileges so that MySQL comes to know about the recent privileges that we have made.
FLUSH PRIVILEGES;
We are done with all the steps for database creation. We can exit MySQL by typing:
exit
Now you are back to the regular SSH command prompt.
Step #2: Configure Nginx
First of all, you need to make sure the default Nginx configuration file is disabled. If it is not disabled, you can disable it by running:
sudo mv /etc/nginx/conf.d/default.conf /etc/nginx/conf.d/default.conf.disabled
We need to create an Nginx configuration for our website example.com. So let’s create an Nginx configuration file using nano or vim editor.
sudo nano /etc/nginx/conf.d/example.com.conf
If you don’t have Vim Editor installed on your server, you can follow our guide: How to Install Vim on CentOS: Easy Step.
Now paste the following configuration inside your example.com.conf file:
 server {
 listen 80 default_server;
 listen [::]:80 default_server ipv6only=on;
 root /var/www/example1.com/public_html;
 index index.php;
 Make site accessible from http://localhost/
 server_name example1.com www.example1.com *.example1.com;
 location / {
 First attempt to serve request as file, then
 as directory, then fall back to displaying a 404.
 try_files $uri $uri/ /index.php;
 Uncomment to enable naxsi on this location
 include /etc/nginx/naxsi.rules
 }
 location ~ .php$ {
 fastcgi_split_path_info ^(.+.php)(/.+)$;
 # NOTE: You should have "cgi.fix_pathinfo = 0;" in php.ini
 #
 # With php7.2-cgi alone:
 fastcgi_pass 127.0.0.1:9000;
 # With php7.2-fpm:
 fastcgi_pass unix:/var/run/php7.2-fpm.sock;
 fastcgi_index index.php;
 include fastcgi_params;
 }
Save the changes.
Note: You must update the PHP version inside this configuration. Since we have PHP 7.2 installed on our server while writing this tutorial, we have updated the fastcgi_pass directive with php7.2-fpm.sock. i.e.,
fastcgi_pass unix:/var/run/php7.2-fpm.sock;
With php5-fpm:
fastcgi_pass unix:/var/run/php5-fpm.sock;
Save the configuration file by hitting CTRL + X (Windows) or CMD + X (Mac).
Then restart the Nginx:
sudo systemctl restart nginx
Step #3: Install WordPress
In this step, we will install WordPress. But before that let’s install some of the PHP modules that will help us run our WordPress-based website smoothly:
sudo yum install php-fpm php-bcmath php-curl php-gd php-imagick php-libsodium php-mbstring php-mysql php-soap php-xml php-zip
Now reload the Nginx so that it recognizes the new module by running the command below:
nginx -s reload
or
sudo service nginx reload
Now let’s create two directories src and public_html:
src: This is the directory where you can download the source code required for your website.
public_html: This is the root folder of your website.
To create these two directories, run:
sudo mkdir -p /var/www/html/example.com/src/
and
sudo mkdir -p /var/www/example.com/html/public_html/
Now set the owner of these new directories to be your web server’s user. In this instance, our web server is NGINX:
sudo chown -R www-data:www-data /var/www/html/example.com/*
Now that we have downloaded all the required PHP extensions, created our website’s root directory, and set the ownership, we are ready to install WordPress.
Navigate to the src directory by typing:
cd /var/www/html/example.com/src/
Now download the latest and most up-to-date version of WordPress by typing:
wget http://wordpress.org/latest.tar.gz
Note: In case you want to download a WordPress file locally, visit its official website.
This will download a compressed archive of WordPress in the src directory.
Extract the archived files using tar command:
sudo tar xzvf latest.tar.gz
After extracting the archive, you will have a directory called wordpress inside your src directory. We need to copy all the files of wordpress the directory inside the root folder of our website i.e., public_html.
To copy all these files we will use rsync the command. Which will safely copy all the files into the public_html directory.
sudo rsync -avP ~/wordpress/ /var/www/html/example.com/public_html/
However, we still need to create an upload directory inside wp-content directory. This will help us store files uploaded by WordPress. To create a folder with this name, run:
sudo mkdir /var/www/html/example.com/public_html/upload
Step #4: Configure WordPress
The configuration required by WordPress can be completed using the web interface by visiting the URL of your website. However, we will learn two different ways to configure WordPress.
Method 1: Manual Configuration
For that, you need to navigate to the default directory of your website and make a copy of wp-config-sample.php. To do that run:
sudo cp wp-config-sample.php wp-config.php
Edit the wp-config.php using your favorite editor. In this example, I am using Nano.
sudo nano wp-config.php
It should look like this:
// ** MySQL settings - You can get this info from your web host ** //
/** The name of the database for WordPress */
define('DB_NAME', 'wordpress');
/** MySQL database username */
define('DB_USER', 'wordpressuser');
/** MySQL database password */
define('DB_PASSWORD', 'password');
You need to change the database information like WordPress Database Name, MySQL Database Username, and Database Password.
Save the changes and enter the URL of your website to complete the configuration.
Method 2: Using Web Interface
In this method, you directly need to enter the URL of your website inside the browser. Once you hit enter, WordPress will take you to the “Setup Configuration Page” which will look like this:
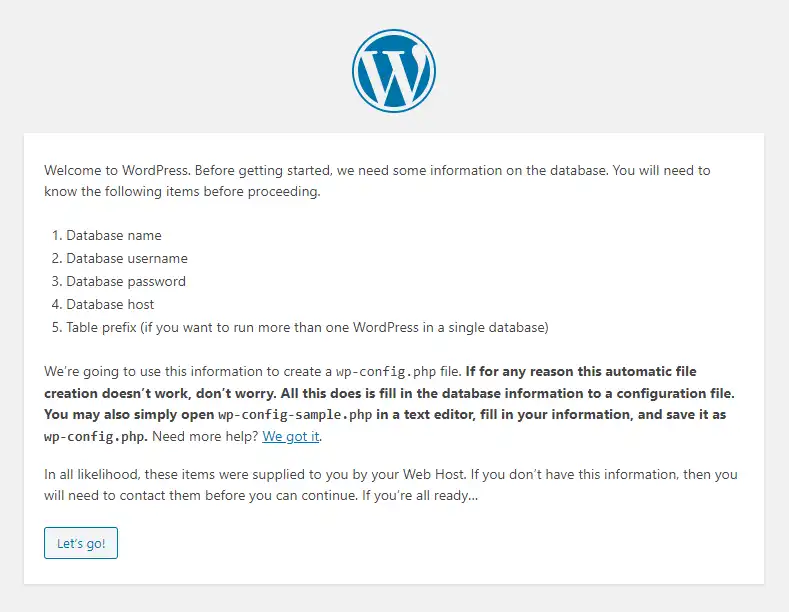
Press Let’s go! button.
You will be taken to the page where you need to enter the database details:
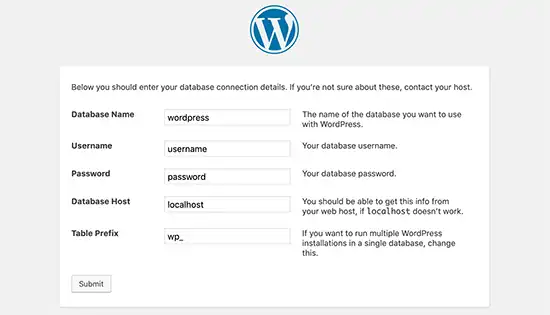
Here you need to enter the Database Name, Username, and Password that you created earlier.
Database Host: Do not disturb the database host unless or until you are using a different host for your database.
Table Prefix (optional): You can replace the default prefix wp_ with some other prefix containing letters and numbers. This will help you set up a more secure version of a WordPress website.
Once you submit, you will be taken to a new page that will confirm a successful database connection.
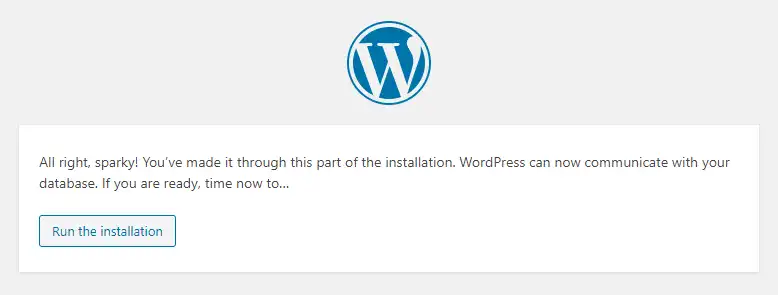
If you don’t see this page, you need to cross-check your database details.
Now click the Run the Installation button.
This will take you to the Installation page, where you need to provide the information related to your website.
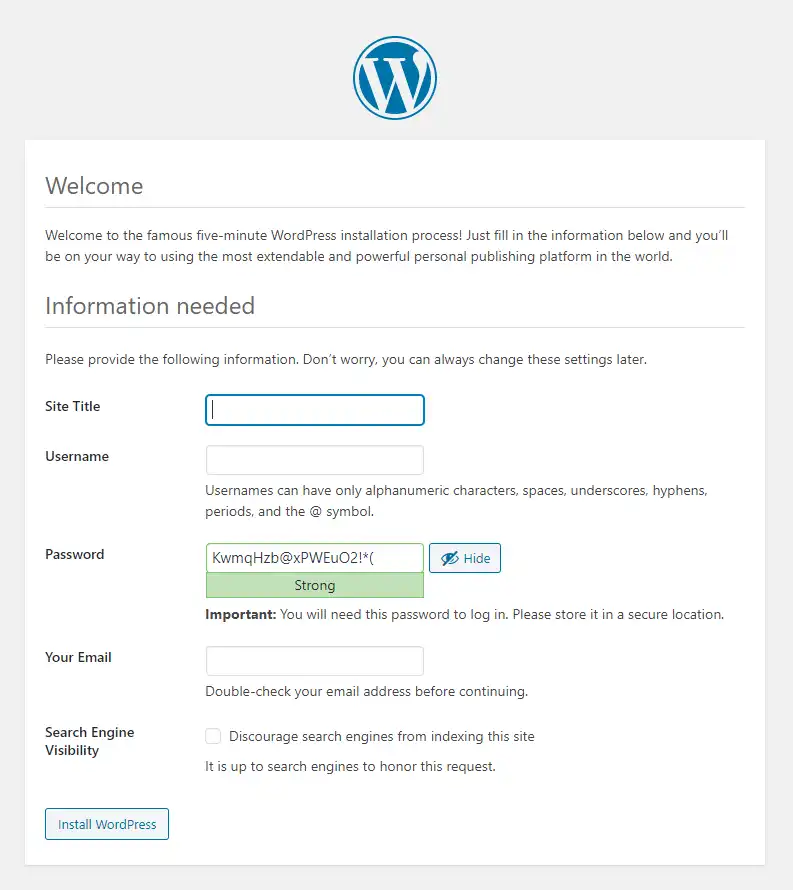
Enter the title of your website, username, password, and email id, and Install WordPress.
Note: Double-check your email id before running the installation because it cannot be changed after installation.
If all goes well, you will see a thank you page which will look something like this:
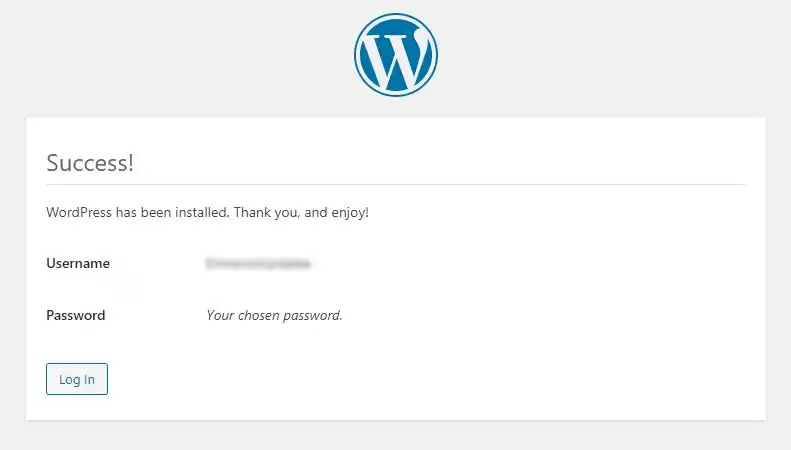
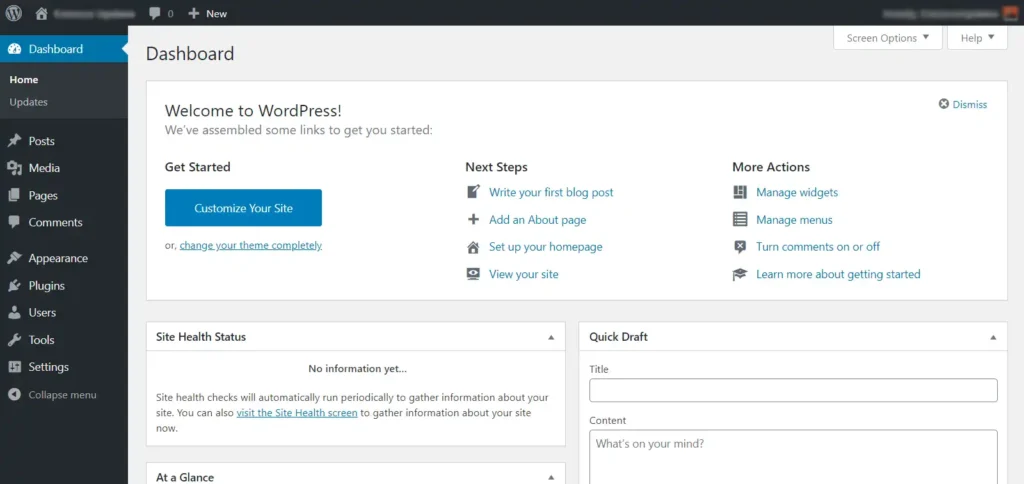
Now you can enter your Website Username and Password to login into the admin panel of your website.
Bonus Resources
If you’re considering launching a profitable website, I highly recommend checking out the comprehensive guide on how to start a profitable blog.
This guide provides valuable insights and practical steps on how to initiate a successful blog that not only captures your passion but also has the potential to generate income.
From choosing the right niche to creating engaging content, optimizing for search engines, and exploring monetization strategies, this guide covers essential aspects of building a website that stands out in today’s competitive online landscape.
By following the tips and recommendations provided in the guide, you can embark on a journey toward establishing a blog that not only resonates with your audience but also has the capacity to yield profitable returns.
Whether you’re a novice or an experienced individual looking to enhance your website-building skills, this guide offers valuable knowledge that can pave the way for a rewarding online venture.
Conclusion
In conclusion, by following the step-by-step guide outlined in this tutorial, you should now have successfully set up a fully functional WordPress-based website on your CentOS 7 server.
From navigating through the installation of necessary components to configuring the database and deploying WordPress, you’ve taken the essential strides to establish your online presence.
This tutorial aimed to simplify the process of installing WordPress on CentOS 7, allowing users to confidently navigate through each stage. Your newly established website can now serve as a platform for blogging, e-commerce, or any other online venture you have in mind.
If you encountered any challenges along the way or have insights to share, I encourage you to leave your thoughts in the comment section below.
Your feedback not only helps improve the tutorial but also contributes to a supportive community of learners who are eager to master the art of WordPress installation on CentOS 7.
Thank you for choosing this guide, and I wish you the best in your web development endeavors.
