WordPress plugins are essential tools that enhance the functionality of your website, allowing you to add features and capabilities without the need for complex coding. Whether you want to improve SEO, boost performance, or enhance user experience, plugins are your go-to solution.
In this beginner-friendly guide on How to Install WordPress Plugins, we’ll show you two easy and reliable methods to install plugins on your WordPress site. Whether you’re launching a new website or managing an existing one, these simple steps will help you get the most out of WordPress in just a few minutes.
How to Install WordPress Plugins
There are two simple ways you can add WordPress Plugins. Either you can use a built-in plugin installer or manually copy and paste it into a default plugin directory in your WordPress. But it is recommended that you first back up your website & databases completely before you continue with the installation.
Let’s add a WordPress Plugin using the built-in plugin installer:
1. Built-In Plugin Installer
First, log in to your WordPress dashboard by visiting www.yourdomain.com/wp-admin/ and entering your administrator credentials. Once logged in, you will have access to all the tools required to manage and customize your website.
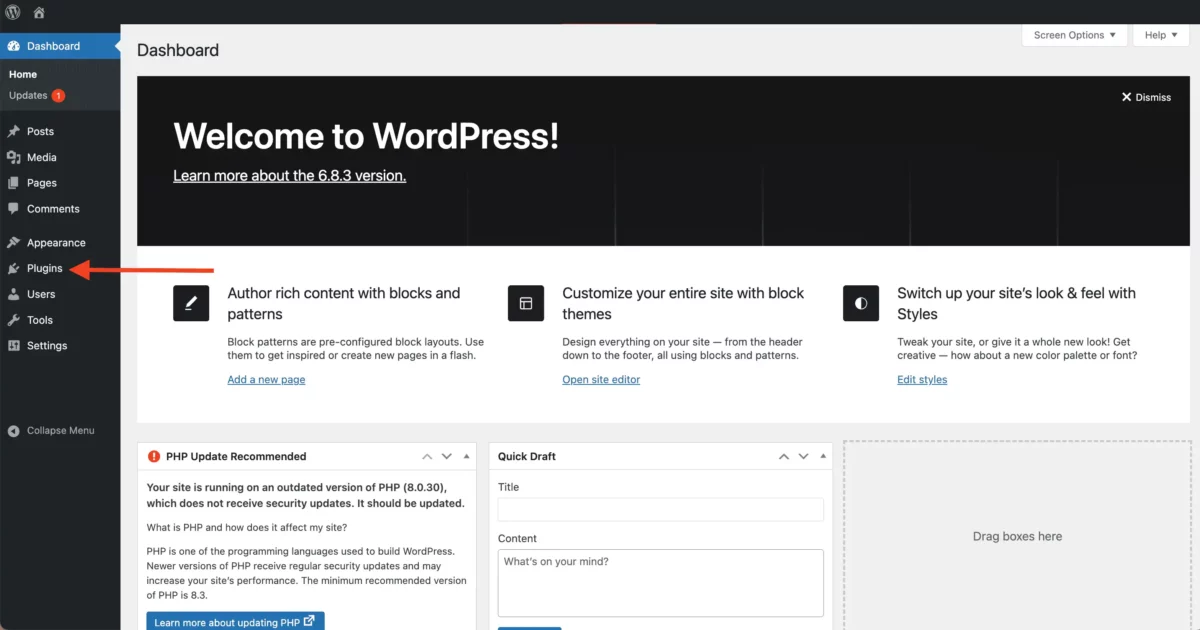
From the WordPress dashboard, navigate to Plugins > Add New from the left-hand menu. This will open the built-in plugin installer, where you can browse and search thousands of free WordPress plugins available in the official repository.
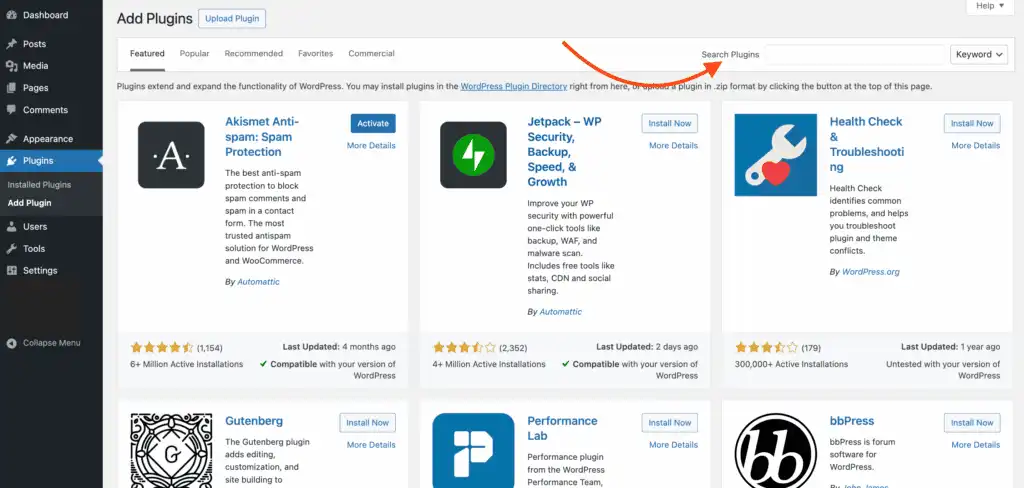
Inside the search box, type the name of the WordPress plugin you want to install. WordPress will display a list of relevant plugins based on your search. Carefully find the correct plugin by checking its name, description, ratings, and number of active installations.
Before installing, you can click on More Details to learn more about the plugin. This section provides useful information such as features, installation instructions, screenshots, user reviews, and compatibility details with your current WordPress version.
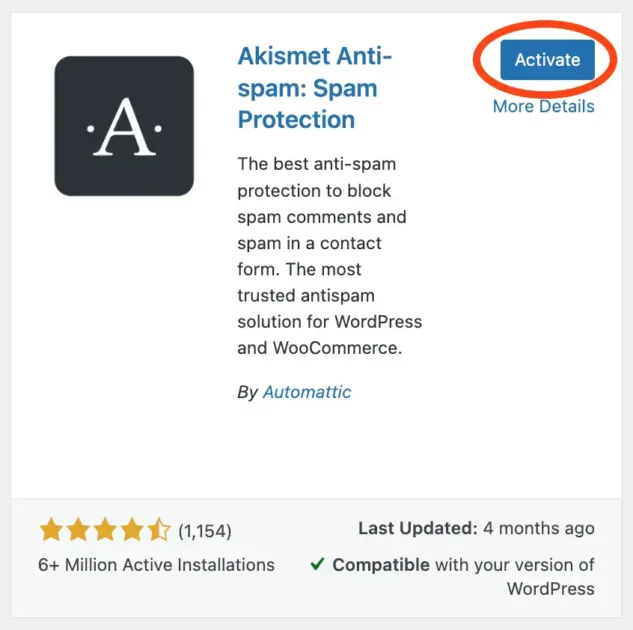
Once you’ve confirmed that the plugin is compatible and suitable for your website, click the Install Now button. A confirmation popup will appear asking you to proceed with the installation. Click the Proceed button to continue.
WordPress will then install the plugin and display an installation status screen indicating whether the process was successful or if any issues occurred. If the installation is successful, click the Activate Plugin button to enable it on your website. Alternatively, you can select Return to Plugin Installer if you wish to install additional plugins.
2. Manual Plugin Installation
First, download the WordPress plugin to your desktop from a trusted source. In most cases, the plugin will be downloaded as a ZIP archive. Once the download is complete, extract the plugin folder to your desktop so that all plugin files are accessible.
Before proceeding with the installation, open and carefully read the readme file included with the plugin. This file contains important information such as installation instructions, compatibility details, and any special configuration steps you may need to follow.
If you have FTP access to your website, use an FTP client to upload the extracted plugin folder to the wp-content/plugins directory within your WordPress installation. Make sure the entire plugin folder is uploaded correctly and placed inside the plugins directory.
For users running a self-managed server, navigate to your website’s root directory using the file manager or terminal. From there, go to the wp-content/plugins folder and paste the extracted plugin folder directly into this directory.
Once the upload is complete, log in to your WordPress dashboard and navigate to the Plugins section. Locate the newly uploaded plugin in the list, then click Activate Plugin to enable it on your website. After activation, follow any additional setup steps required by the plugin to ensure it works correctly.
How to Manage WordPress Plugins
Managing WordPress plugins is a crucial aspect of maintaining a functional and secure website. As your site evolves, you’ll likely install and activate various plugins to enhance its capabilities. However, effective management ensures that your site remains optimized, secure, and free from conflicts.
1. Regularly Update Your Plugins
Plugin updates often contain bug fixes, security enhancements, and new features. Failing to update your plugins can leave your website vulnerable to security breaches or performance issues. Here’s how to stay up to date:
- Check for Updates: In your WordPress admin dashboard, navigate to the “Plugins” section and look for the update notifications.
- Update All at Once: Select all available plugins and click the “Update” button to ensure everything is current.
2. Keep Your Plugin List Lean
While plugins offer valuable functionality, using too many can slow down your website, increase security risks, and lead to compatibility issues. Follow these steps to maintain a lean plugin list:
- Regular Review: Periodically assess your installed plugins. If you no longer need a plugin or if its functionality overlaps with another, consider deactivating and uninstalling it.
- Quality Over Quantity: Choose plugins from reputable sources and developers. Prioritize well-maintained plugins with consistent updates and positive reviews.
3. Deactivating & Deleting Plugins
- Login into your WordPress (www.yourdomain.com/wp-admin)
- Navigate to Plugins » Installed Plugins
- Inside the Search box, type in the name of the WordPress Plugin or scroll down to the plugin you wish to deactivate or uninstall.
- Find the WordPress Plugin you wish to delete.
- Firstly, you need to deactivate the WordPress plugin.
- Once the plugin is deactivated, the delete option will appear.
- To delete the plugin, click delete.
4. Test Compatibility
Before installing a new plugin, ensure it’s compatible with your current WordPress version and other plugins. Follow these steps:
- Check Documentation: Review the plugin’s documentation and compatibility information on its official page.
- Staging Environment: If possible, test new plugins in a staging environment before deploying them on your live site.
5. Monitor Performance
Plugins can impact your website’s speed and performance. Use tools like Google PageSpeed Insights or GTmetrix to assess your site’s performance:
- Identify Slow Plugins: If a plugin is causing performance issues, consider finding alternatives or optimizing your current setup.
6. Backup Regularly
Before making major changes, such as installing or updating plugins, create a backup of your website. This ensures you can easily revert to a working version in case of unexpected issues.
Conclusion
Throughout this guide, we’ve embarked on a journey through the intricate process of installing and managing WordPress plugins, unraveling the intricacies that lie beneath this essential aspect of website customization.
From the initial selection of plugins that align with your goals and needs, to the step-by-step installation process using the WordPress admin dashboard or FTP, we’ve equipped you with the tools needed to seamlessly integrate new features into your website. But installation is only the beginning.
I hope you you would find this guide on how to install WordPress plugins useful. Thank you for being a part of this journey, and let’s keep the conversation alive and thriving in the comments below!
